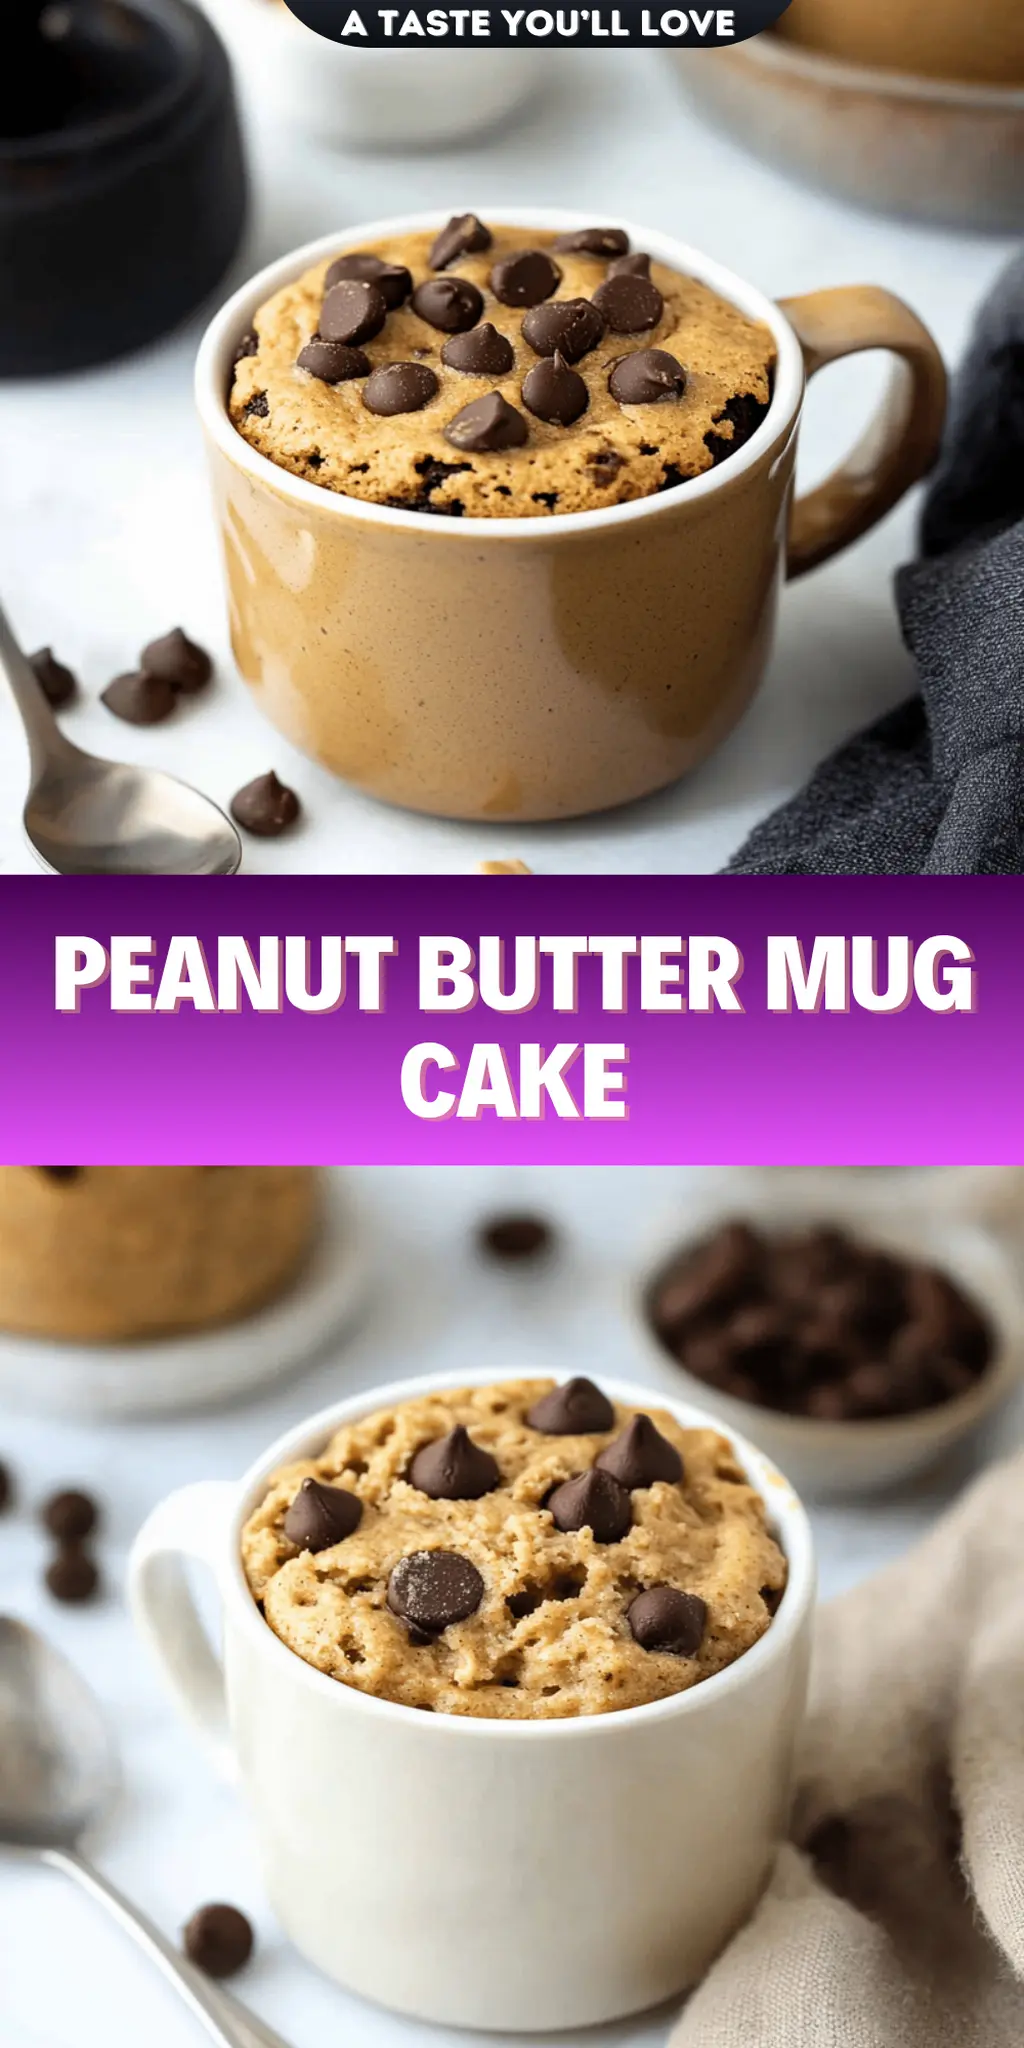
After a long day, there’s nothing quite like the warm hug of a freshly baked treat to lift your spirits. Enter the Peanut Butter Mug Cake, my go-to for those moments when I crave something sweet yet quick. The comforting aroma of creamy peanut butter mixed with a hint of vanilla fills the kitchen, and just a few minutes later, I have a delicious, decadent dessert ready to devour straight from the mug.
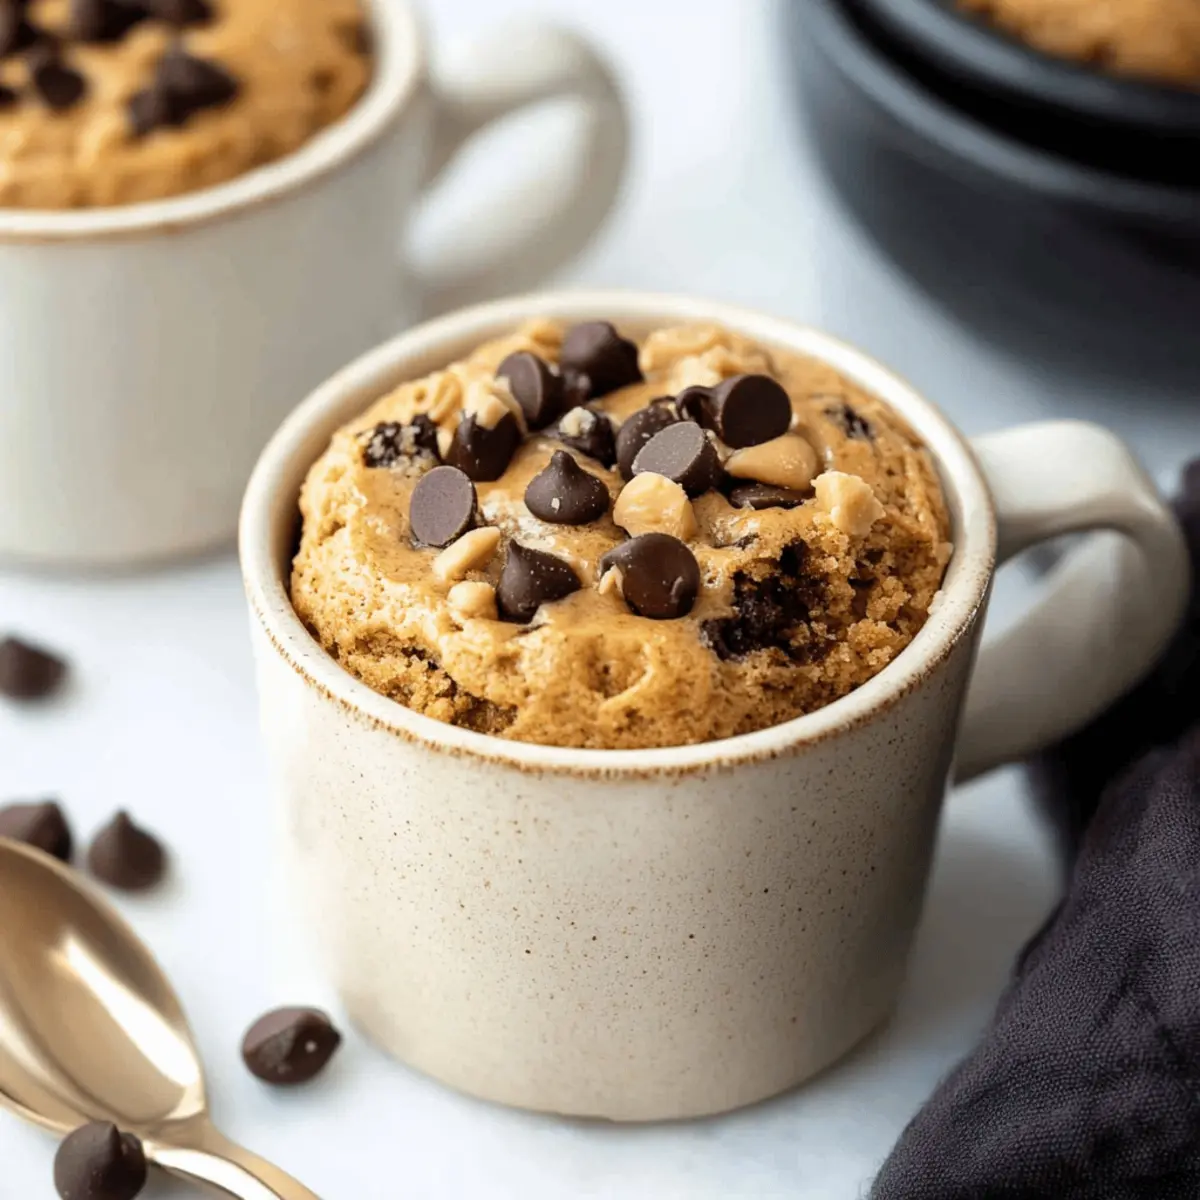
It’s amazing how simple ingredients like peanut butter, an egg yolk, and a sprinkle of chocolate chips can come together to create something so satisfying. This one-serving wonder is perfect for busy weeknights or a spontaneous treat when you’re skipping takeout in favor of a home-cooked indulgence. Whether you’re a busy professional or a culinary enthusiast looking for a sweet escape, this mug cake promises to delight your taste buds with minimal effort. So, grab your favorite mug, and let’s whip up some magic in just four minutes!
Why will you love this Peanut Butter Mug Cake?
Simplicity: With just a handful of ingredients, this recipe comes together in mere minutes, making it perfect for anyone craving a quick dessert.
Decadent Flavors: The rich combination of peanut butter and chocolate creates an irresistible taste that will satisfy your sweet tooth completely.
One Serving Wonder: Enjoy a delightful treat tailored just for you—no need to share!
Flexibility: Want to play around? Customize with your favorite nuts or a sprinkle of sea salt for an extra level of indulgence.
Fast and Fun: This mug cake is a speedy solution to dessert cravings, allowing you to savor a homemade treat without the hassle of baking an entire cake.
Get ready to indulge in a simple yet scrumptious experience!
Peanut Butter Mug Cake Ingredients
• Gather these tasty ingredients for your quick dessert!
For the Batter
- Creamy peanut butter – the star of this Peanut Butter Mug Cake, providing a rich texture and flavor.
- Unsalted butter – adds moisture and richness to the cake.
- Light brown sugar – contributes a lovely caramel-like sweetness that complements the peanut butter.
- Large egg yolk – binds the ingredients and adds fluffiness to the cake.
- Whole milk – ensures the cake is moist and tender with each bite.
- Pure vanilla extract – a delightful flavor accent that enhances the overall taste.
- All-purpose flour – forms the base of the cake, giving it structure.
- Baking powder – ensures your mug cake rises to fluffy perfection.
- Kosher salt – balances the sweetness and enhances the flavors.
For the Topping
- Mini chocolate chips – sprinkle them in for a sweet surprise that melts beautifully into the cake.
How to Make Peanut Butter Mug Cake
-
Prepare the Mug: Lightly coat the inside of an 8-ounce microwave-safe mug with nonstick cooking spray. This will help your cake slide right out and prevent any sticky mishaps.
-
Mix the Butters: In a small microwave-safe bowl, combine creamy peanut butter and unsalted butter. Microwave for about 15–20 seconds until softened, then stir until the mixture is completely smooth and well blended.
-
Add Sugar: Sprinkle the light brown sugar into the warm peanut butter mixture. Stir until well combined, allowing the warmth to dissolve any clumps of sugar for a smooth batter.
-
Incorporate the Wet Ingredients: Add in the lightly beaten egg yolk, milk, and vanilla extract, stirring until everything is smoothly combined and luscious.
-
Combine the Dry Ingredients: Gently fold in the all-purpose flour, baking powder, and a pinch of kosher salt. Stir just until there are no dry spots left—overmixing can lead to a dense cake!
-
Mix in the Chocolate Chips: Fold in the mini chocolate chips with love, ensuring they are evenly distributed throughout the batter for delightful surprises in every bite.
-
Fill the Mug: Spoon the batter into your prepared mug, and if you like, add a few extra chocolate chips on top for an indulgent touch.
-
Microwave the Cake: Microwave on high for 40 to 55 seconds, checking at the 40-second mark—a perfectly cooked mug cake should look puffy and slightly set.
-
Cool Down: Let the mug cake cool for about 2 minutes before serving; this helps it firm up a bit and makes for an enjoyable eating experience.
-
Enjoy: Dive in warm, straight from the mug, savoring every delicious bite of your delightful Peanut Butter Mug Cake!
Optional: Sprinkle a pinch of sea salt on top for added flavor.
Exact quantities are listed in the recipe card below.
Expert Tips for Peanut Butter Mug Cake
-
Measure Accurately: Ensure you measure ingredients like peanut butter and flour precisely; too much can lead to a dense final cake.
-
Microwave Power Check: Every microwave is different; start with 40 seconds and check for doneness. A cake that rises but is still slightly wet in the center is perfect!
-
Avoid Overmixing: Stir gently when incorporating the dry ingredients. Overmixing can lead to a tougher texture instead of the light, fluffy mug cake you want.
-
Experiment with Add-ins: Feel free to add nuts, dried fruits, or even a dash of cinnamon for a twist on your Peanut Butter Mug Cake.
-
Serving Recommendations: Enjoy it warm, but for extra fun, top with a scoop of ice cream or a drizzle of chocolate sauce for indulgence!
Make Ahead Options
These Peanut Butter Mug Cakes are a fantastic option for busy home cooks looking to save time without sacrificing flavor! You can prepare the dry ingredients—including flour, baking powder, and salt—up to 3 days in advance. Simply mix these together in a bowl and store in an airtight container. For the wet ingredients, you can combine the peanut butter and unsalted butter, refrigerating this mixture for up to 24 hours to maintain its smooth consistency. When you’re ready to whip up your mug cake, just add the rest of the ingredients (like the sugar, egg yolk, milk, and vanilla), then microwave as instructed. This way, you’ll enjoy a delicious dessert with minimal effort and just as much warmth!
Peanut Butter Mug Cake Variations
Embrace your creativity and make this delightful cake your own with these fun twists!
- Nutty Alternative: Swap out peanut butter for almond or cashew butter for a different nutty flavor profile.
- Gluten-Free: Use a gluten-free all-purpose flour blend to make this cake suitable for gluten-sensitive eaters. It’s just as delicious!
- Vegan: Replace the egg yolk with 1 tablespoon of flaxseed meal mixed with 2.5 tablespoons of water, and use a non-dairy milk. A simple switch that keeps it moist!
- Spicy Chocolate: Add a pinch of cayenne pepper or chili powder for a spicy kick that beautifully enhances the chocolate chips. It’s a daring twist that surprises the palate!
- Banana Bliss: Mash half a ripe banana and mix it into the batter for natural sweetness and added moisture. Bananas and peanut butter are a classic match made in heaven!
- Salted Caramel: Drizzle some salted caramel sauce on top before microwaving for an indulgent, gooey texture that elevates your mug cake game. Pure decadence!
- Berries Boost: Fold in fresh or frozen berries like raspberries or blueberries for a fruity flavor to brighten each bite. The burst of juice is a delightful surprise!
- Chocolate Overload: Use mini chocolate chunks instead of chips for an even richer chocolate experience, making every bite a chocolate-lover’s dream come true.
What to Serve with Peanut Butter Mug Cake?
After experiencing the bliss of a warm, chocolatey mug cake, you’ll want to complement it with equally delightful sides that enhance the sweetness.
- Vanilla Ice Cream: The creamy, cool texture of vanilla ice cream creates a delicious contrast to the warm mug cake, making every bite unforgettable.
- Fresh Berries: A mix of raspberries and blueberries adds a refreshing brightness and tartness to balance the richness of the cake.
- Chocolate Sauce: Drizzling warm chocolate sauce over the cake offers an extra layer of indulgence that any chocolate lover will adore.
- Whipped Cream: Light and fluffy whipped cream atop the mug cake provides a decadent creaminess that transforms it into an elegant dessert.
- Coffee or Espresso: A hot cup of coffee enhances the chocolate and peanut butter flavors, creating a cozy atmosphere perfect for enjoying your sweet treat.
- Nutty Granola: A sprinkle of crunchy granola adds texture and a hint of earthiness, making this pairing perfect for those who love a bit of crunch.
- Milkshake: A creamy chocolate milkshake creates a rich, dessert-like experience that pairs perfectly with the flavors of the mug cake.
- Chai Tea: The warm spices of chai tea contrast beautifully with the sweetness of the cake, offering a comforting beverage to sip alongside.
- Salted Caramel Drizzle: The sweet-salty burst of caramel enhances the peanut butter flavor, elevating your mug cake experience to a whole new level!
How to Store and Freeze Peanut Butter Mug Cake
-
Room Temperature: If you’ve got leftovers, let the Peanut Butter Mug Cake cool, then enjoy it within 1 day, kept in a sealed container to maintain moisture.
-
Fridge: Store any uneaten cake in the refrigerator for up to 3 days. Make sure it’s covered tightly to keep it from drying out.
-
Freezer: For longer storage, freeze the cooled mug cake for up to 1 month. Wrap it tightly in plastic wrap, then place it in an airtight container.
-
Reheating: When ready to enjoy, thaw in the fridge overnight, then microwave for about 10–15 seconds, just until warmed through—perfect for a cozy treat!
Peanut Butter Mug Cake Recipe FAQs
Can I use crunchy peanut butter instead of creamy?
Absolutely! If you enjoy the texture of crunchy peanut butter, feel free to swap it instead of creamy. Just keep in mind, the cake will have a slightly different texture, but it’ll be just as delicious!
How should I store any leftover mug cake?
If you have any leftovers (which is rare for this delightful treat!), let the Peanut Butter Mug Cake cool completely. Store it in a sealed container at room temperature for up to 1 day or refrigerate for up to 3 days. Be sure to cover it tightly to prevent drying out.
Can I freeze a Peanut Butter Mug Cake?
Yes, you can! To freeze, let the mug cake cool completely after cooking. Wrap the mug tightly in plastic wrap and then place it in an airtight container. It will keep well in the freezer for about 1 month. When you’re ready to enjoy it, let it thaw in the fridge overnight, then microwave for around 10-15 seconds until warmed through.
Why did my mug cake turn out dense?
A dense mug cake can sometimes happen if the ingredients are overmixed or if too much flour has been added. When combining the dry ingredients, gently fold until there are no dry spots. If you’re unsure about measures, use a kitchen scale for the best results!
What if I have allergies to some ingredients?
No worries! You can easily adapt this recipe to suit dietary restrictions. For instance, you can use a dairy-free butter alternative if lactose intolerant or substitute with a flaxseed egg (1 tablespoon ground flaxseed + 2.5 tablespoons water; let sit for 5 mins) for a vegan option. Just ensure you pick allergy-friendly alternatives as needed.
Can I make this mug cake in a different size mug?
Absolutely! Just keep in mind that cooking time may vary if you adjust the size of the mug. A larger mug might require a bit more time, while a smaller one may cook faster. Always check at the 40-second mark, and adjust accordingly for a perfect fluffiness!
Peanut Butter Mug Cake Recipe FAQs
Irresistibly Easy Peanut Butter Mug Cake for a Sweet Fix
Ingredients
Equipment
Method
- Lightly coat the inside of an 8-ounce microwave-safe mug with nonstick cooking spray.
- In a small microwave-safe bowl, combine creamy peanut butter and unsalted butter. Microwave for about 15–20 seconds until softened, then stir until smooth.
- Sprinkle the light brown sugar into the warm peanut butter mixture. Stir until well combined.
- Add in the lightly beaten egg yolk, milk, and vanilla extract; stir until smooth.
- Gently fold in the all-purpose flour, baking powder, and a pinch of kosher salt.
- Fold in the mini chocolate chips, ensuring they are evenly distributed.
- Spoon the batter into the prepared mug and add a few extra chocolate chips on top if desired.
- Microwave on high for 40 to 55 seconds, checking at the 40-second mark.
- Let the mug cake cool for about 2 minutes before serving.
- Enjoy warm, straight from the mug.