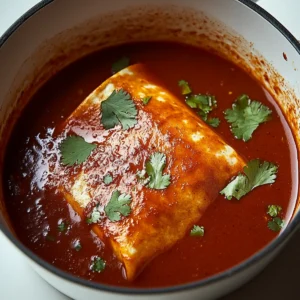
There’s something incredibly satisfying about rolling up warm tortillas and filling them with a savory chicken mixture, a comforting moment that transforms any weeknight into a fiesta. Recently, as I was rummaging through my fridge trying to get creative with leftovers, I rediscovered the bliss of enchiladas. The vibrant colors of enchilada sauce, melted cheeses, and fresh cilantro danced on my plate, sparking joy and nostalgia for family dinners.
This recipe is a perfect canvas for creativity, allowing you to make it your own with the ingredients you have on hand. With just a few simple steps, you’ll be able to whip up a meal that’s not only delicious but also a hit for both kids and adults alike. Whether you’re looking to impress at a gathering or just want a cozy dinner at home, these enchiladas are the answer. Ready to dive into a delightful culinary experience? Let’s get rolling!
Why are Enchiladas a Must-Try Dish?
Comforting, flavorful goodness: Enchiladas are the perfect fusion of spices, herbs, and creamy cheese that transport you to your favorite Mexican restaurant.
Easy to customize: Use whatever protein or veggies you have on hand, making them endlessly versatile for any dietary preference.
Quick prep & cook: In just 45 minutes, you can create a satisfying meal that’s ideal for busy weeknights.
Crowd-pleaser: These cheesy rolls are sure to win over family and friends, suitable for any occasion from casual dinners to festive gatherings!
Make ahead: Prepare a batch in advance and pop them in the oven for a stress-free meal at your fingertips.
Enchiladas – the delightfully cheesy treat your taste buds have been craving!
Enchiladas Ingredients
• Gather everything you need for these delicious enchiladas!
For the Filling
- Soft corn tortillas – essential for a tender and tasty wrap that holds everything together.
- Cooked shredded chicken – quick and easy protein that can be swapped with beans or beef if desired.
- Enchilada sauce – the flavorful base that brings all the ingredients together; feel free to use store-bought or homemade for that personal touch.
For the Toppings
- Shredded cheddar cheese – adds a classic cheesy flavor that melts beautifully on top.
- Shredded Monterey Jack cheese – for a creamy texture and a hint of tanginess; mix it with cheddar for an unbeatable combo.
- Sour cream – a dollop on top enhances the richness and balances the spice wonderfully.
- Chopped fresh cilantro – a vibrant finish that adds freshness and a burst of color to your plate.
Now that you have all the key ingredients for your enchiladas, you’re one step closer to creating a meal that warms the heart and pleases the palate!

How to Make Enchiladas
-
Preheat: Start by preheating your oven to 375°F (190°C), creating the perfect environment for your enchiladas to bake beautifully.
-
Mix: In a large bowl, combine the cooked shredded chicken with half of the enchilada sauce and a generous sprinkle of cheddar cheese. This mixture is the flavorful heart of your enchiladas!
-
Warm Tortillas: In a skillet over medium heat, warm each tortilla until soft and pliable, making them easier to roll without tearing. Just a minute or so on each side should do!
-
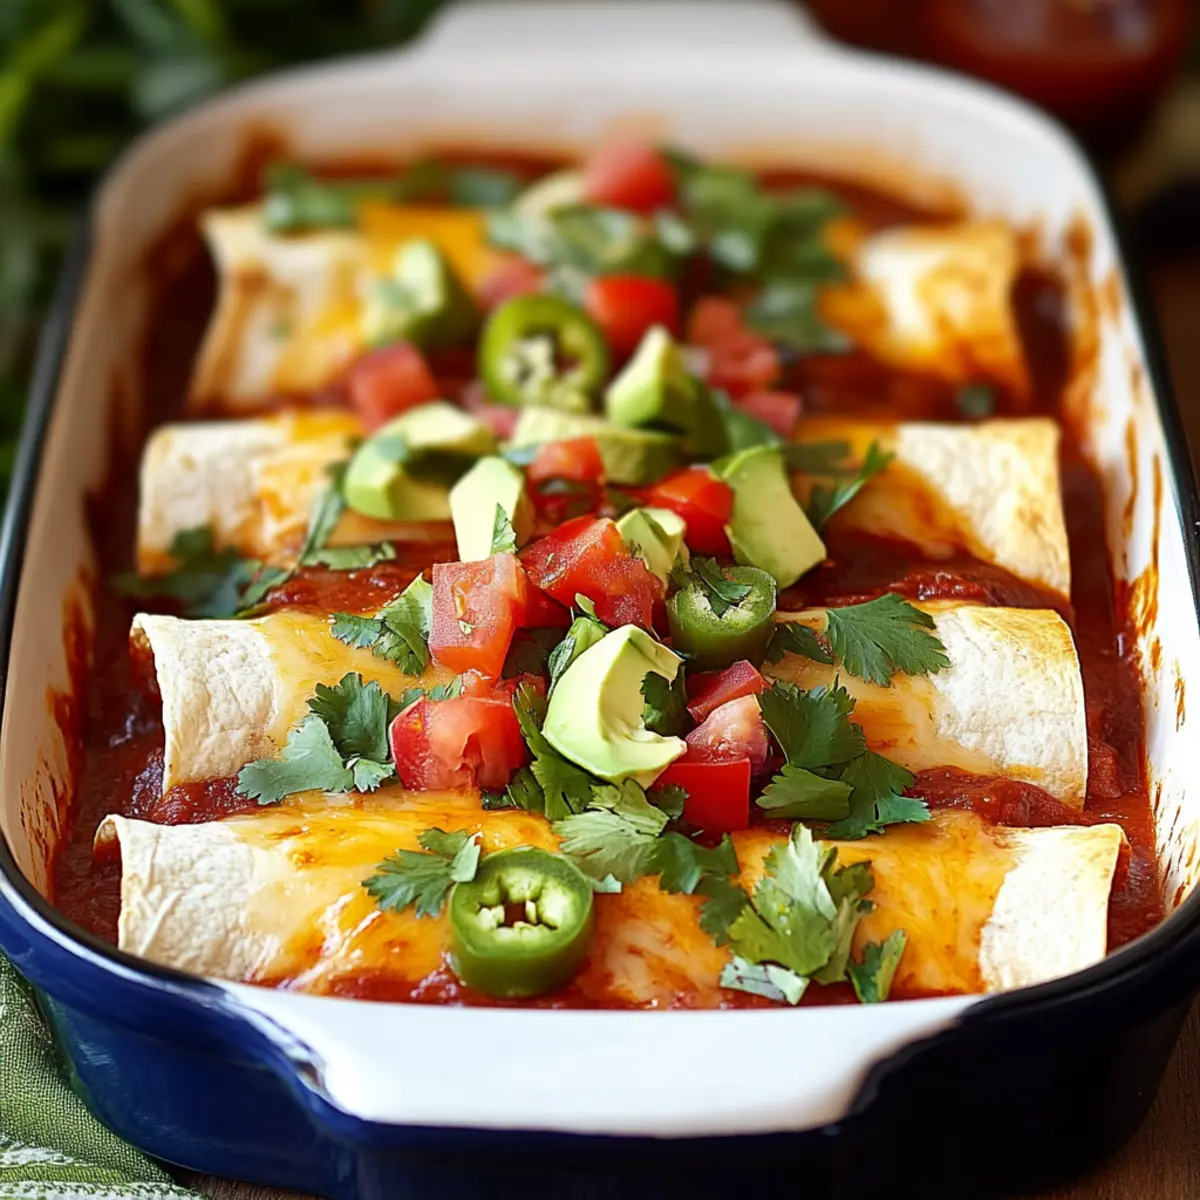
Fill: Spoon the chicken mixture evenly onto each tortilla, then roll them tightly and place seam-side down in a greased baking dish. Pack them in snug for that comforting hug of flavor.
-
Sauce: Pour the remaining enchilada sauce over the rolled tortillas, ensuring every roll is coated. Sprinkle the top generously with the remaining shredded cheese for that gooey, melty delight.
-
Bake: Cover the dish with foil and pop it in the oven for 20 minutes. Remove the foil and bake for an additional 10 minutes, until the cheese is bubbly and golden brown.
Optional: Garnish with extra cilantro for a fresh touch!
Exact quantities are listed in the recipe card below.
Enchiladas Variations & Substitutions
Feel free to explore these delightful adaptations that can elevate your enchilada game!
-
Vegetarian: Swap out chicken for black beans and assorted veggies like bell peppers and zucchini for a hearty, meat-free option.
-
Spicy: Add sliced jalapeños or a sprinkle of cayenne pepper to the chicken mixture for an extra kick that will thrill heat lovers!
-
Cheese Lovers: Incorporate a blend of pepper jack cheese and Gouda for a richer flavor profile and creamy texture that oozes in every bite.
-
Gluten-Free: Use corn tortillas or make your own using gluten-free flour for a safe and delicious gluten-free alternative.
-
Creamy Spin: Mix in some cream cheese with the chicken and enchilada sauce for a velvety filling that elevates comfort food to new heights.
-
Seafood Twist: Substitute shredded chicken with cooked shrimp or crab for a coastal flavor that brightens up the classic dish.
-
Herb Infusion: Enhance freshness by adding fresh oregano or taco seasoning to the chicken mixture, giving an aromatic depth to your enchiladas.
-
Ranch Style: Stir in ranch seasoning with your filling for a unique, tangy twist that complements the cheesy goodness beautifully.
With these variations, you’ll never run out of ways to enjoy enchiladas—each version a new adventure!
Make Ahead Options
These enchiladas are perfect for meal prep enthusiasts! You can assemble the whole dish up to 24 hours in advance, simply layering the filled tortillas in the baking dish with sauce and cheese. Cover tightly with plastic wrap or foil to keep them fresh. If you want to prep even further ahead, you can freeze the assembled enchiladas for up to 3 months; just make sure to cover them well to prevent freezer burn. When ready to cook, simply thaw overnight in the refrigerator and bake as directed, adding an extra 5-10 minutes to ensure they’re heated through. With these make-ahead options, you can enjoy a delicious homemade meal with minimal last-minute effort!
Expert Tips for Perfect Enchiladas
-
Tortilla Care: Warm tortillas in a skillet briefly to prevent tearing. This makes rolling effortless and keeps your enchiladas intact.
-
Sauce Balance: Don’t skimp on the enchilada sauce; it infuses flavor and moisture. Ensure each tortilla is saturated before baking.
-
Cheese Blend: Mixing cheddar and Monterey Jack offers a richer flavor and creamier texture. Feel free to experiment with other cheeses for a unique twist!
-
Filling Options: Use rotisserie chicken or leftover proteins for a quicker prep. Vegetarians can easily swap in beans or roasted veggies for a satisfying alternative.
-
Prepare Ahead: Assemble enchiladas a day in advance and cover tightly in the fridge. Just pop them in the oven when you’re ready to serve!
What to Serve with Enchiladas?
Create the perfect meal around these cheesy rolls that will leave everyone craving more!
- Spanish Rice: This classic side adds a fluffy, flavorful touch that balances the richness of enchiladas beautifully.
- Refried Beans: Creamy and savory, they bring a satisfying texture and complement the chicken filling perfectly.
- Guacamole: Fresh and zesty, this avocado dip brightens the dish while providing a creamy contrast to the spicy sauce.
- Mexican Street Corn: Charred corn coated in creamy sauce topped with lime and chili gives a sweet and tangy crunch to your plate.
- Chopped Salad: Crisp lettuce, tomatoes, and avocados drizzled with lime dressing offer a refreshing contrast to the hot enchiladas.
- Sangria: A fruity, chilled drink full of vibrant flavors pairs beautifully with the zest of enchiladas, making every bite even more delightful.
- Churros: End your meal on a sweet note with these crispy dessert treats, adding a touch of nostalgia and indulgence to your dining experience.
How to Store and Freeze Enchiladas
Fridge: Store leftover enchiladas in an airtight container for up to 3 days. Reheat in the microwave or oven until heated through and melty.
Freezer: For longer storage, wrap enchiladas tightly in plastic wrap and place them in a freezer-safe container. They can be frozen for up to 3 months.
Reheating: Thaw enchiladas in the fridge overnight before reheating. Bake at 350°F (175°C) for 20–25 minutes, or until heated through.
Sauce Separation: If freezing, consider keeping some enchilada sauce separate to avoid sogginess upon reheating. Enjoy the deliciousness of homemade enchiladas again!
Enchiladas Recipe FAQs
How do I choose the best tortillas for enchiladas?
Absolutely! When selecting corn tortillas, look for soft ones that are pliable and free of any dark spots or cracks. They should bend easily without breaking – this indicates freshness. If you find them in the refrigerated section, they’re often fresher and more delicious!
How should I store leftover enchiladas?
Very easy! Store any leftover enchiladas in an airtight container in the fridge for up to 3 days. When you’re ready to enjoy them, simply reheat in the microwave or in the oven until they’re warmed through and the cheese is melted again.
Can I freeze enchiladas for later?
Yes, you can freeze enchiladas with great success! Wrap the assembled enchiladas tightly in plastic wrap, then place them in a freezer-safe container. They can last for up to 3 months. When ready to serve, thaw them overnight in the fridge, then bake at 350°F (175°C) for about 20-25 minutes until heated through. Don’t forget to add some extra sauce if they seem a bit dry!
What if my tortillas keep tearing while I roll them?
Oh no, that can be frustrating! Make sure to warm the tortillas in a skillet until soft and pliable—just about a minute on each side should make a big difference. Also, avoid overfilling, as this can cause them to break while rolling.
Are enchiladas suitable for vegetarian diets?
Absolutely! You can easily adapt this enchiladas recipe for vegetarian diets. Instead of chicken, use black beans, refried beans, or roasted vegetables such as zucchini and bell peppers. Just make sure to choose a vegetable-friendly enchilada sauce!
How long will enchiladas stay good in the fridge?
Leftover enchiladas will stay good in the fridge for about 3 days if stored properly in an airtight container. Keep an eye on them for any signs of spoilage, like an off smell or mold, to ensure a safe and tasty meal!
Satisfyingly Cheesy Enchiladas: A Delicious Homemade Delight
Ingredients
Equipment
Method
- Preheat your oven to 375°F (190°C) to prepare for baking the enchiladas.
- In a large bowl, combine the cooked shredded chicken with half of the enchilada sauce and a generous sprinkle of cheddar cheese.
- In a skillet over medium heat, warm each tortilla until soft and pliable, about a minute on each side.
- Spoon the chicken mixture evenly onto each tortilla, roll them tightly, and place seam-side down in a greased baking dish.
- Pour the remaining enchilada sauce over the rolled tortillas and sprinkle with the remaining shredded cheese.
- Cover the dish with foil and bake for 20 minutes. Remove the foil and bake for an additional 10 minutes until cheese is bubbly.